Images courtesy of Wizards of the Coast
Welcome to our first deck tech of Aetherdrift Standard! Midrange as an archetype has been dominated by black decks for several years now. That said, Selesnya (green/white) Midrange has seen some success in the format despite not having access to black’s removal spells.
I’ve been really looking forward to playing this deck with a new toy from Aetherdrift, so let’s jump right in!
Table of Contents
ToggleWhat’s the Game Plan for Selesnya Midrange in Standard?
Selesnya Midrange is a deck that wants to flood the board with creatures. It’s not uncommon to have five creatures on board on turn three with a good start. Our creatures make one-for-one removal look a lot worse than usual, while we still pack some of our own to deal with threats our army can’t just swing around.
The deck can have some very aggro draws – enough so that you sometimes see similar lists called Selesnya Aggro instead!
The Creatures of Selesnya Midrange
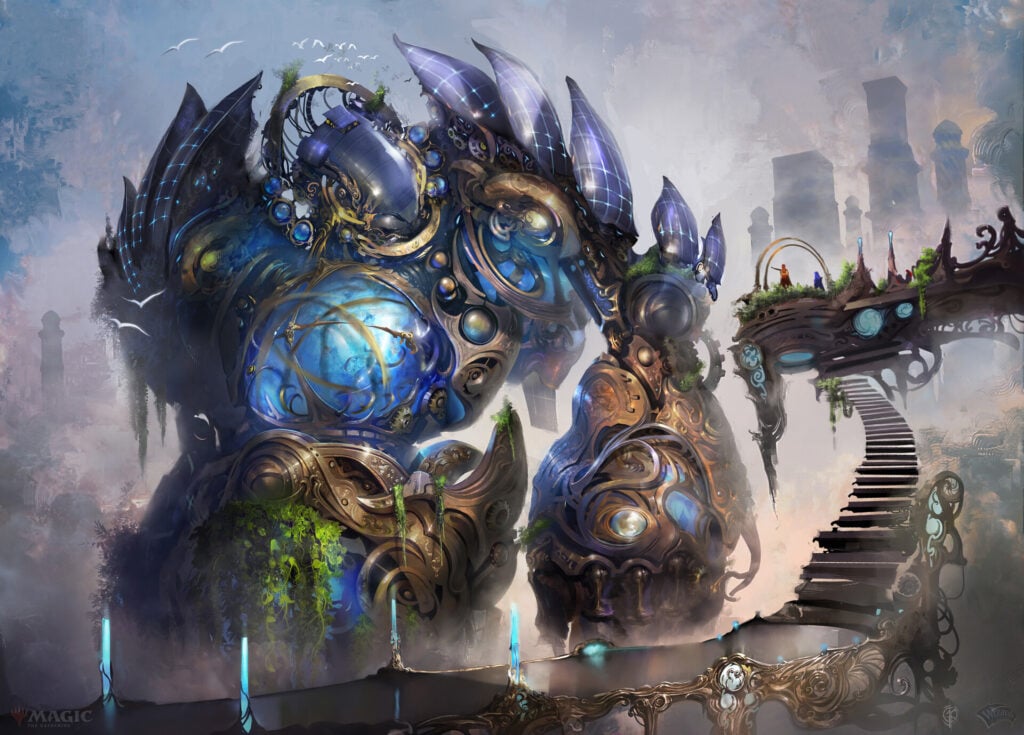
Let’s start with the headliner for this version of the deck. Brightglass Gearhulk combines a powerful body with guaranteed card advantage, provided you’ve built your deck with a few relevant targets. In many cases getting two one-drop permanents isn’t going to be super impactful by the time the Gearhulk hits the battlefield, but we get a lot of utility by playing multiple viable tutor targets, some of which can be played for more than one mana! Let’s work our way up the mana curve.
In my last Standard deck tech on Golgari Midrange, I said that Llanowar Elves is one of the big reasons to be playing green-based midrange. This holds true in Aetherdrift Standard. Our most powerful draws involve getting the Elves down on turn one and following up with a three-mana spell. Pawpatch Recruit is a wildly flexible card; it can be played on one or three mana depending on your needs. Whether it’s chipping in for damage, punishing removal spells, or acting as a tutor target for Brightglass Gearhulk, this Rabbit kind of does it all.
Unfortunately, you won’t always untap with an Elf on turn two. As such, we have a handful of two-drops to fill out the curve. Seraphic Steed is a real pain for opposing aggro decks, as it blocks well and gains life. With the help of some of our three-drops, it can easily be saddled and create an Angel token on turn three! Melira, the Living Cure is an above-rate threat that can also help protect our other creatures. It’s one of many ways we make opposing removal look weak!
Our three-drops all come with a friend! Sandstorm Salvager makes a 3/3 Golem, Sanguine Evangelist a 1/1 Flying Bat (potentially two), and Toby, Beastie Befriender a 4/4 Beast. They all have their ups and downs, but they fulfill the same function of providing lots of power and toughness across multiple bodies. Sanguine Evangelist has the lowest synergy with the rest of the deck, as it can’t saddle Seraphic Steed on turn three and it can’t let you play a card off of Collector’s Cage (which we’ll talk about a bit later), but it provides the most bodies and evasion.
This has to be one of the funniest cards we get to play. Obviously Wilt-Leaf Liege pumping most of our team makes it a great top-end option (it has no effect on our Golem and Bat tokens, but double-pumps other copies of itself and Brightglass Gearhulk.) In a metagame infested with Esper and Dimir Self Bounce decks, this will sometimes win games on its own! It punishes Hopeless Nightmare really hard and has similar value against the less popular Bandit’s Talent and Liliana of the Veil.
Our last creature is only played at one copy, but thanks to Brightglass Gearhulk you’ll often have it when you need it! It plays kind of like a Fireball, being a way to dump a bunch of mana into a hasty threat to close out a game. Creature-based decks like this often struggle in the face of board wipes like Sunfall, so this gives us a way to push through the last few points of damage once the board is clear and their shields are down. I originally tried this at two copies, but found I never needed the second one.
The Spells for Selesnya Midrange in Standard
We have a couple of removal options. Get Lost is flexible instant removal, dealing with most problematic permanents but providing your opponent Map tokens. You need to be careful with your timing, as some decks can get enough value off the Map tokens for this to feel bad.
Sheltered by Ghosts is likely one of the most tilting cards in Standard, providing flexible removal, stabilization, power, and protection all in one package! If the format wasn’t overrun by self-bounce decks with Nowhere to Run, we’d surely be playing more than two.
Dusk Rose Reliquary is not a common sight in Standard, but being a valid Brightglass Gearhulk target pushes it into playability here. We’ll often have a random extra creature token we can sacrifice to cast it, and it continues the theme of being flexible removal. Shardmage’s Rescue is our other tutorable non-creature, fulfilling the opposite role of anti-removal. I’ve found that I don’t end up casting it that often, but just keeping mana open for it once your opponent knows it’s there can really make their life difficult!
This is the card that put Selesnya Midrange on the map last year. With a good draw, Collector’s Cage can cheat out a big spell as early as turn three! Other versions of this deck without the Gearhulk package can use this to cheat out Overlord of the Mistmoors, but we’re still more than happy to get any free spells off this (in addition to the +1/+1 counters). I’m down to three copies of this card since it’s not great in multiples, but you do want to see it relatively often.
The Lands
Our mana base is pretty standard for a two-color deck. We want minimal lands coming in tapped and have strict color requirements for Gearhulk, so we don’t play much in terms of utility. That said, Restless Prairie has really overperformed for me so far. It’s not uncommon for it to pump a team of three or more other creatures, ending games out of nowhere. Don’t underestimate it!
The Sideboard
Aven Interrupter – Mainly good against control. Use this to delay a board wipe for a crucial turn or exile a counterspell forever. Also has benefits against fringe decks that cast a lot of cards from exile, like Quintorius Combo.
Invasion of Gobakhan – Another anti-control card.
Elspeth’s Smite / Destroy Evil – Additional removal. Elspeth’s Smite’s cheap cost and exile ability make it great against Red Aggro and recursive threats like Unstoppable Slasher or Afterburner Expert. Destroy Evil comes in more against midrange and control decks with larger threats/enchantments.
Split Up – A cheap board wipe, mainly for aggro match ups. You can run Temporary Lockdown instead if you prefer, but it’s not as well suited to a format with so much enchantment removal and bounce effects.
Obstinate Baloth – This is mainly for discard-heavy decks, especially if they don’t know you have Wilt-Leaf Liege after game one. It can also help patch up the aggro and burn matchups, though it isn’t fast enough on its own to stop Heartfire Hero and friends.
Rest in Peace / Ghost Vacuum – Graveyard hate. Bring it in against any of the decks looking to cheat in Atraxa, Grand Unifier or Omniscience. Ghost Vacuum can be tutored up with Brightglass Gearhulk, so I’d consider bringing it in against Afterburner Expert decks as well.
Tips and Tricks for Selesnya Midrange
- I’ll almost always prioritize casting Llanowar Elves over Pawpatch Recruit turn one. The Rabbit has a lot of utility when it comes down later that the Elves don’t, and our strongest starts require that mana ramp.
- On Arena, be mindful of the auto-tapper and Llanowar Elves. The auto-tapper is more than happy to leave you with no white sources if it means keeping Elves untapped, which can ruin a play based on holding up certain interaction.
- When sequencing three-drops, I’ll prioritize Sanguine Evangelist if I think my opponent has removal or I really want the flyer. Otherwise, as I said earlier, the other two three-drops have synergies with the rest of the deck that make them better.
- Sideboarding usually involves taking out some amount of ineffective removal spells. Sheltered by Ghosts can be played around by removal-heavy decks, and Dusk Rose Reliquary may be a dead card versus control. Against aggro, you can cut Goldvein Hydra and some number of Collector’s Cage.
- There’s a lot to think about when it comes to what to tutor with Brightglass Gearhulk. If I’m the one applying pressure, I usually want Goldvein Hydra and Shardmage’s Rescue to close out the game. If I’m in a more defensive position, I probably want to get something off the board with Dusk Rose Reliquary and maybe get a few blockers down with Pawpatch Recruit. You can mix and match your tutor targets as the situation requires.
This deck has been a blast to play, so I hope you give it a shot! Thank you so much for reading, and I hope you come back for the next deck breakdown.
Want to see what else has me excited in Aetherdrift? Check out the Top 10 Best Cards in Aetherdrift for Standard, or my Aetherdrift Draft Primer!


